How to Replace a Door Lock Yourself
2025-03-28 11:22
Replacing a door lock is a simple yet essential home improvement task that anyone can tackle with a bit of patience and the right tools. Whether you want to enhance security, update the look of your door hardware, or replace a malfunctioning lock, the process can be completed in just a few easy steps. This guide will walk you through the entire process of replacing a door lock yourself.
1. Gather the Necessary Tools and Materials
Before you begin, make sure you have all the tools and materials you'll need. Here's a list of essentials:
●New door lock set (ensure it matches the size of the current lock)
●Screwdriver (usually Phillips or flat-head)
●Drill (if new holes are necessary)
●Measuring tape
●Pencil or marker for marking positions
vWood filler (if you need to fill old holes)
●Safety glasses (for protection)
In addition to basic tools, you might also consider acquiring other lock-related accessories, such as lock picking tools, for further security customization. If you're interested in exploring a range of high-quality tools, you can buy lock picking tools at barhomevip.com.
If you're replacing an interior or exterior door lock, it's important to select the correct type—either a knob lock, deadbolt, or combination lock. Measure your existing lock to make sure the new one fits, and ensure it matches the door's backset (the distance from the edge of the door to the center of the knob or deadbolt).
2. Remove the Old Lock
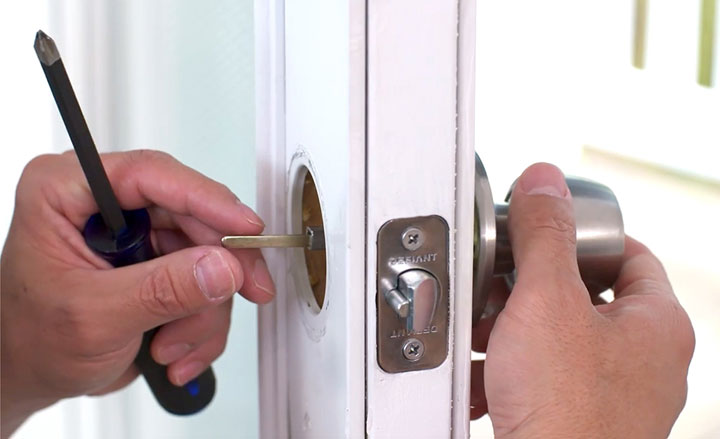
Start by unscrewing the screws that hold the old lock in place. This may require using a screwdriver to remove screws from the handle or deadbolt assembly. Depending on the type of lock you're replacing, you might need to remove the knob, deadbolt, or both.
Once you've unscrewed the handle and deadbolt, carefully pull the old lock hardware out of the door. If there are any additional parts, such as a strike plate or keyhole cover, remove them as well. Be cautious of sharp edges while working around the lock.
3. Inspect and Prepare the Door
Take a close look at the hole in the door. Ensure the space is clean, and there are no issues like loose screws or jagged edges that could interfere with the installation of the new lock. If necessary, use wood filler to fix any damaged areas. Once the filler has dried, sand the area smooth to ensure the new lock fits securely.
Measure the backset and hole size to ensure that your new lock will fit properly. This is important because some locks may require larger or differently spaced holes.
4. Install the New Lock
Now it's time to install the new lock. Start by inserting the latch (the part of the lock that engages with the door frame) into the hole. Ensure it is aligned correctly and flush with the edge of the door. Secure the latch using screws, making sure it is tightly fastened but not over-tightened, as this could damage the door or latch.
Next, attach the exterior part of the lock (the side that faces outside) to the door. Align the components properly, ensuring the keyhole or handle is positioned correctly. Follow the manufacturer's instructions for your specific lock, as some require inserting the internal mechanism before securing the exterior.
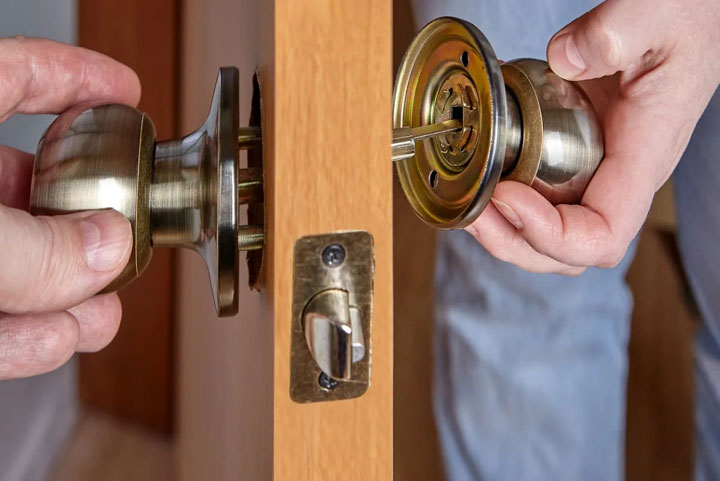
Once the exterior hardware is in place, insert the interior hardware (the side that faces inside the home), ensuring it lines up with the exterior components. Secure the interior part of the lock with screws, making sure it's firmly in place. If your lock has a deadbolt, repeat this process for the deadbolt mechanism.
5. Install the Strike Plate
The strike plate is the metal plate on the door frame that the latch or deadbolt slides into when the door is closed. To install it, position the plate in the correct spot on the door frame and mark the screw holes with a pencil. Drill pilot holes for the screws, and then attach the strike plate securely.
Ensure the latch or deadbolt aligns with the strike plate, making it easy to lock and unlock the door.
6. Test the Lock
After the lock is installed, test it to make sure it functions properly. Turn the handle, lock and unlock the deadbolt, and check that everything is aligned and secure. If the door doesn't close properly, you may need to adjust the latch or strike plate to ensure a smooth operation.
7. Final Adjustments and Cleaning
If the lock works smoothly, give the door and lock a final inspection. Tighten any loose screws, and check that all parts are secure. If you had to drill new holes for the lock, touch up any wood with paint or filler to keep your door looking neat.
Clean the new lock components with a soft cloth to remove any fingerprints or debris.
Conclusion
Replacing a door lock is a straightforward task that can greatly improve the security and appearance of your home. By following these simple steps, you can replace a lock yourself and feel confident in your ability to enhance your home's security. Just remember to take your time, use the correct tools, and carefully follow the manufacturer's instructions for your new lock.

1. Gather the Necessary Tools and Materials
Before you begin, make sure you have all the tools and materials you'll need. Here's a list of essentials:
●New door lock set (ensure it matches the size of the current lock)
●Screwdriver (usually Phillips or flat-head)
●Drill (if new holes are necessary)
●Measuring tape
●Pencil or marker for marking positions
vWood filler (if you need to fill old holes)
●Safety glasses (for protection)
In addition to basic tools, you might also consider acquiring other lock-related accessories, such as lock picking tools, for further security customization. If you're interested in exploring a range of high-quality tools, you can buy lock picking tools at barhomevip.com.
If you're replacing an interior or exterior door lock, it's important to select the correct type—either a knob lock, deadbolt, or combination lock. Measure your existing lock to make sure the new one fits, and ensure it matches the door's backset (the distance from the edge of the door to the center of the knob or deadbolt).
2. Remove the Old Lock
Start by unscrewing the screws that hold the old lock in place. This may require using a screwdriver to remove screws from the handle or deadbolt assembly. Depending on the type of lock you're replacing, you might need to remove the knob, deadbolt, or both.
Once you've unscrewed the handle and deadbolt, carefully pull the old lock hardware out of the door. If there are any additional parts, such as a strike plate or keyhole cover, remove them as well. Be cautious of sharp edges while working around the lock.
3. Inspect and Prepare the Door
Take a close look at the hole in the door. Ensure the space is clean, and there are no issues like loose screws or jagged edges that could interfere with the installation of the new lock. If necessary, use wood filler to fix any damaged areas. Once the filler has dried, sand the area smooth to ensure the new lock fits securely.
Measure the backset and hole size to ensure that your new lock will fit properly. This is important because some locks may require larger or differently spaced holes.
4. Install the New Lock

Now it's time to install the new lock. Start by inserting the latch (the part of the lock that engages with the door frame) into the hole. Ensure it is aligned correctly and flush with the edge of the door. Secure the latch using screws, making sure it is tightly fastened but not over-tightened, as this could damage the door or latch.
Next, attach the exterior part of the lock (the side that faces outside) to the door. Align the components properly, ensuring the keyhole or handle is positioned correctly. Follow the manufacturer's instructions for your specific lock, as some require inserting the internal mechanism before securing the exterior.
Once the exterior hardware is in place, insert the interior hardware (the side that faces inside the home), ensuring it lines up with the exterior components. Secure the interior part of the lock with screws, making sure it's firmly in place. If your lock has a deadbolt, repeat this process for the deadbolt mechanism.
5. Install the Strike Plate
The strike plate is the metal plate on the door frame that the latch or deadbolt slides into when the door is closed. To install it, position the plate in the correct spot on the door frame and mark the screw holes with a pencil. Drill pilot holes for the screws, and then attach the strike plate securely.
Ensure the latch or deadbolt aligns with the strike plate, making it easy to lock and unlock the door.
6. Test the Lock
After the lock is installed, test it to make sure it functions properly. Turn the handle, lock and unlock the deadbolt, and check that everything is aligned and secure. If the door doesn't close properly, you may need to adjust the latch or strike plate to ensure a smooth operation.
7. Final Adjustments and Cleaning
If the lock works smoothly, give the door and lock a final inspection. Tighten any loose screws, and check that all parts are secure. If you had to drill new holes for the lock, touch up any wood with paint or filler to keep your door looking neat.
Clean the new lock components with a soft cloth to remove any fingerprints or debris.
Conclusion
Replacing a door lock is a straightforward task that can greatly improve the security and appearance of your home. By following these simple steps, you can replace a lock yourself and feel confident in your ability to enhance your home's security. Just remember to take your time, use the correct tools, and carefully follow the manufacturer's instructions for your new lock.
 Promotion: 5% Discount Code: 5vip